Search This Blog

Sunday, October 25, 2020

Topical Christmas Card with Cricut

  This is a CRICUT PRINT AND CUT ONLY accordion card....there is a Halloween one that can be adapted that is cut only...link to halloween card at the bottom.  

Cricut link for this one...   https://design.cricut.com/landing/project-detail/5f919f288e3eae0c082278ca 


Supplies  (I used)

7 pieces 110 white card stock,  8.5x11
Printer and Cricut, score tool or wheel
Scissors
Thin Pop Dots
Glue (I use Art Glitter band glue)
Bone folder
Craft knife
Stickles holographic


Directions
 The cut out pieces are set up to include the 3D pieces to do the Paper Toile...if you just want the card without the few fussy cut pieces, delete all the extra pieces in the middle except one Santa (and maybe two gifts.)


When preparing to print you might want to use the print dialog box and set your print to best...otherwise it may print lines on it...

You can continue to print once the first piece has started cutting..

Two panels may look identical, you do need them both...

Once all your pieces are cut out, double check all the white pieces are pulled away...use the craft knife, if needed, to remove any. 

Then, fold your two accordion sides pieces on all the score lines in a fan fold..it doesn’t matter which direction you start with, you can flip it... Burnish your lines down.


Attach back panel. Put glue on  the flat, white edge on one piece of the side..lay the back on the edge leaving about 1/8 of the inside edge free..(this allows it to fold flatter). 


Then attach the other side, lining up the top and bottom, but still leaving about an 1/8 open on the side Panel.

Next panel is the sandman...take one of the two loose snowmen And fussy-cut out the lei, nose, and hat. 


Add pop dots to the full sandman, and attach on top the panel sandman, then add little slivers off the pop dot edges and put them in place.


Put this panel in, By attaching the left side of the panel into the next fold, only this time, leave @ 1/4 Inch of the inside of the flap edge open...then add glue to the other side... slip the panel in and close it flat to get it correctly in place, making sure the top also stays even...it’s a bit tricky, but just take your time...


Tree panel is next.  Lay out the pieces...cut the trunk away from one piece and cut away the back gift...cut the center two branches and coconuts away from the second piece and cut out the gifts as shown..


Using the pop dots attach the pieces.


Attach this panel exactly the same way you did the sandman panel.


Top panel...fussy-cut one  flamingo and the two Santa’s not on the surfboard as shown...


Using the pop dots layer the pieces. When adding the full Santa on the skateboard piece, keep in mind much of the Santa is off the card, and won’t need pop dots on those areas. Like seen here.


Continue to build up the pieces of the Santa, flamingo, and heading....Add the extra gifts anywhere you’d like them.


Add the top panel to the card lining up the sides, top and bottom, but push it flat too, as the glue sets, to insure it will lay down.  Add glitter to coconuts and all the fur, and add dots to the tree in the heading...😎

All done..


Halloween card link    

https://design.cricut.com/landing/project-detail/5d4ddd9bcfb1a20604761877


Thursday, October 22, 2020

Tag Slider Card with Cricut

 Tag Slider Card


Link to Cricut project.

https://design.cricut.com/landing/project-detail/5f8f1adf7a14770d3c05d026

The project is ready to cut, but a few things...the tag is pink on the mat, but it’s to be cut from printed card stock, or a color of your choice..doubled sided is nice as the inside shows a little.

I have a maker so I cut with the intricate card stock setting. You will need a 

Premium fine point blade and a scoring tool or wheel.
A few pieces of thin ribbon or yarn                                                12 x 12 sheet of card stock (doubled sided print recommended)
           Smaller pieces of cardstock in red, green, white, black, light and dark brown, Dark blue, and (gold for image two And a gold glitter or gel pen for image one).  (Naturally you can substitute any color you want for any of these)
       Good paper glue (I use Art Glitter brand glue)
       5 x 7 envelope

Score and Cut out your pieces. You can cut the holly, or if you prefer, draw the holly with a pen...delete or hide the one you don’t want.
Same for the glitter piece or the Beary  Christmas, you only need one or the other.... Once all the pieces are cut...

Put the card together. Fold in half and on all the score lines..the door will look like a mountain with the little flap at the bottom flat..

Now put a full line of glue in the fold and just on the edges of the other side and bottom...no glue on the  top.

I made it look pink in the photo below  don’t go any further in toward the center. Close the card a line the out side edges up exactly, burnish down.


Let it dry a few minutes, then slide the tag in through the top. It will stop right at the very top edge of the bottom of the card piece, where it’s in the pink square ...don’t try to tuck it up inside at the bottom...it should set flush.

Now to glue them together...run a bead of glue on the folded up piece of the window flap of the card..like
Below where you see the pink...push it  down flat on to the Bottom of the tag...press and hold till dry..

Once dry, you can pull up on the tag and the bottom of the window will pull up.

Now put your bear pieces together..
And once made,  put glue on just the bottom half of the back.


Glue that bottom half just to the bottom half of the flap, line it up with the top fold piece at the bottom.
Put your holly and words together if you are using them.
Glue the two extra candy canes and the extra holly at the top of the tag..add the ribbon pull...don’t get carried away With lots, or thick ribbon, or It won’t fit in the envelope.
Glue the gold flourish or the words inside the card as a stop for the flap.  (The red pattern on card one is just the back side of the double sided paper.) 


All done...it will fit in a 5 x 7 envelope. 
If you have questions fell free to email me at lldsmith2@comcast.net 
as well as several other blogs listed in my profile on the right...


Sunday, March 22, 2020

Working on New Infusion Shirt

Sea Life

A new infusion tee I’m working on...just got it finished (iPad, Art Studio Pro app) four days to draw...                                                            
Now, I get to color! Here’s the png file (below) if anyone wants to play! Remember, it’s intended to just be a basic outline you add the details as you color...
Once you upload and save as a cut file, (it’s big so it might automatically save as a print, but you can change it to draw and it’s fine). All the black colored in areas will be outlines...I have also mirrored it, as the octopus looks funny facing the wrong way...
I’ll update as I get more of the coloring done...


Png File 300 dpi.

Any more than that on a png file and Design Space takes out the transparency.


Saturday, March 21, 2020

I Have No Shelf Control

Infusion tee shirt

New Cricut infusion tee shirt.  So much fun putting this together. 
Very important, don’t forget to mirror before you draw, or all the words will be backwards when you press...(for more details see the infusion page).


Infusion Designs


I’ve been playing With designing tee shirts for using the Cricut infusion pens...it’s so much fun....I’m going to share my first three if anyone else wants to play...remember...these pattern designs are just outlines you need to add your own twist...I’m going to add a new page, too for infusion designs to make them easier to find as I do more....and to make it easier for me, each design will have its own post because it’s hard to have a long string of text with photos, working from an iPad...


          Tangled Girl

The design has the girl and a file for the hat strips...the rest is done by hand.  It’s completely drawn and Zentangled in Cricut infusion pens. Once you change it from cut to draw, the black strands of hair will become outlines...


Hat crown inset.


Inside Stepper Card

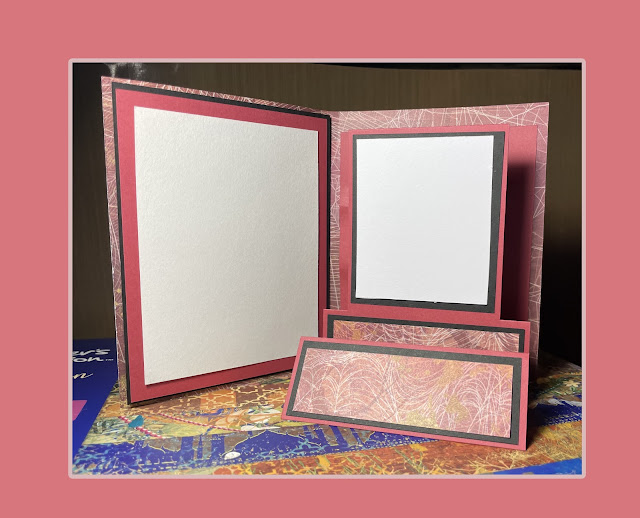
 Inside Stepper Card.  This is a Cricut file (and Almost Crafters Companion template Violet 23). I couldn’t get the CC template to stand up ...