The original template uses a piece of 8.5 x 11 card stock with 1/4 inch trimmed off the short edge… the Cricut template is slightly reduced so you can cut it from a 11 x 8.5 piece of card stock…you can resize the Cricut file to whatever you want. Not sure why the link isn't working directly, if you copy and paste it, it's fine ... very weird. It's also in the Cricut community under Lucine Smith. Bee Basket.
Cricut file with the bees https://design.cricut.com/landing/project-detail/62e2f887fd5669d872a44faa
File of the Basket only. All shapes should be free to cut.
https://design.cricut.com/landing/project-detail/62e2caeefd5669d872a444c0
This link below will get you to me….🤷♀️


How to put the basket together…(the template, if you don’t have a cricut and want to hand cut, is at the bottom of the instructions).
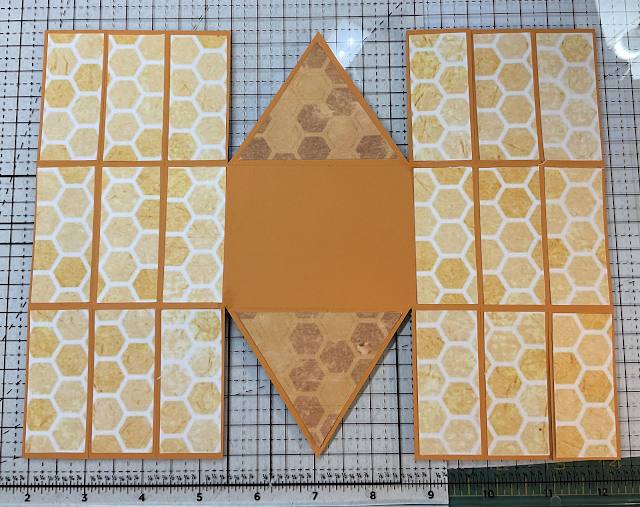
1. Cut out the pieces…you’ll have the main body, 18 rectangle panels, two triangle panels, three strips for handle, 2 outer and two inner circles or other shapes for side accent.

2. Fold and burnish all your score lines, all of them toward the inside.

3. Then flip it over and firmly glue all panels in place…make sure the outer edges have glue on them, or they will pop away from the base when put together (like mine did🤨🙄)…
4. Glue the two top panels together (or use red line tape). Move the other stuff out of the way downward. Then attach about 1/4 inch total on the edges.
The next two panels are glued on, not quite halfway up, but as close to the center as possible. Keep the side folds in place. They will be angled downward a bit.
Then glue up the last two side panels the same way.
Put glue on the remaining piece (The triangle) and fold up and into place. Lay it down and rub well inside to make sure it sticks well.
Do the other side exactly the same way.
Curl, with your fingers, all three of the handle pieces before you glue them together, this will keep them from wrinkling or pulling away when you attach them to each other.
Then, Glue the three pieces on top of each other.
Glue the handle inside the basket.
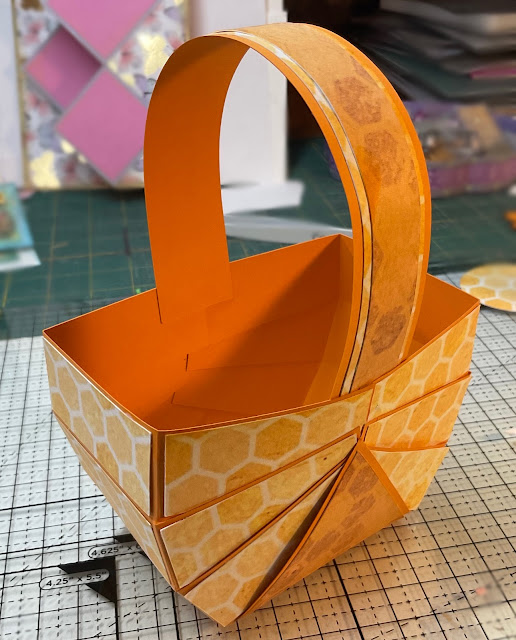
Add your side decorations.
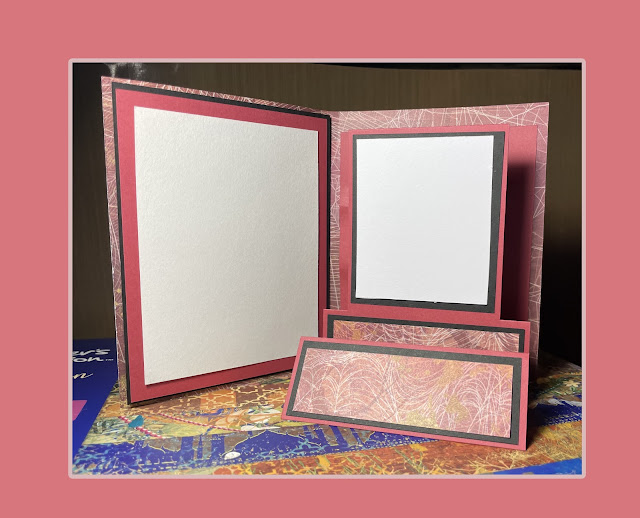
The bees on the top basket were drawn from Cricut Access images with the fine point Cricut pen on white card stock and colored with alcohol markers. The bees on the bottom basket were stamped with a Crafters Companion stamp and ink and then colored, one with CC alcohol ink and one with watercolor.
Template.
Base is made from one sheet of 8.5 x 11-inch card stock (you'll need two, if you want the base of the handle to be the same color).
1. You need to trim 1/4 off the bottom edge to have 8 1/4" x 11".
2. Turn the sheet in a landscape orientation. Score the entire distance top to bottom at 1.25 (1 1/4"), 2.50 (2 1/2"), 3.75 (3 3/4"), 7.25 (7 1/4"), 8.5 (8 1/2") 9.75 (9 3/4").
3. Also, score the long way at 2.75 (2 3/4) and 5.50 (5 1/2") That should divide the paper into exact thirds.
4. At the top and bottom mark exactly halfway across the sheet, that's at the 5.5 mark. Draw a line from the top of the mark down to where the first two score lines meet. Do this on both sides of the mark and both side of the panel. (the triangles in red.)
5. Cut the lines along the score lines that are red.
6. Handle. Cut one strip the base color. 1.25 x 10 inches (1 1/4" by 10") Cut one or two more decorative pieces (matching the decorative panels) to nest inside the base strip. Keep the 10" length, but reduce the width as desired, about 1/4" smaller each. (about 1" x 10", and 3/4" x 10" but it's whatever you choose).
7. Decorative Panels. 1 sheet of Patterned cardstock or paper of choice. You'll need 18 rectangles ... 1.125" x 2.6" (or roughly 1 1/8" x 2 3/5") It doesn't have to be exact, just consistent, so make one template and use that to cut them all. You will also need two triangles in a contrasting patten. The base width is 3 1/8" and the height is a bit less than 2 1/2" but the easiest way is to draw around the triangle piece itself and trim about 1/8" off all the way around it and use that for a template. Similar to the dark grey piece at the very center top.
8. Decorative Circles. These are also cut from the patterned card stock. They can be any shape or decoration desired.
9. Once you have your pieces cut, follow the same directions posted above to put it together.