Search This Blog

Monday, November 4, 2019

Gift Iris Fold

I did another Christmas Iris fold pattern, but this one has a twist! I also make a template that you can color your own colors, so you can match it to any paper to do your folds...


All files to copy and save are on the Christmas Iris Fold Page.


This one is full color and includes the designer paper.


This one is printed out in shaded black and white so that you can use any of your own paper and color it any way you want to match.  This one was colored with Copic markers and folded with scrapbook paper.


This one was also printed in black and white, but the bow was printed straight out onto the same scrapbook paper that was used as one of the iris fold papers.  This design was colored with Prisma color pencils.


For a Birthday card. I printed on bright white 110 cardstock from Staples. Colored with Copic markers and a gold Sharpie. (With a touch of Stickels). Folded traditionally with scrapbook  paper...
This was uploaded and cut on my Cricut Maker. 

Saturday, October 26, 2019

Christmas Candle

Christmas Candle, Iris Fold

sized for a 5 x 7 card (you can easily reduce it).

The card on the right is card stock with inked edges. The card on the left is traditional folded paper.  I enlarged the paper strips to fill the page, printed on plain white copy paper, then cut them long way in half.  That was plenty to be able to be able to do traditional folding.
300 dpi png files.


Iris Fold Holiday Pear

I think this pear is good for Christmas, Thanksgiving or just Autumn.
Sized for a 5 x 7 inch card


Copy and save 300 dpi png files.

Not sure why the pattern images are disappearing… not sure I still have this one…😞


Monday, October 21, 2019

Christmas Cat


This design was designed to be printed and cut with a circuit machine.  If you don't have an electronic cutting machine the high quality (300 dpi) png files will print from any computer and can be hand cut.

Included files:  Cat panel, chart, tails, paper strips, cheat panel
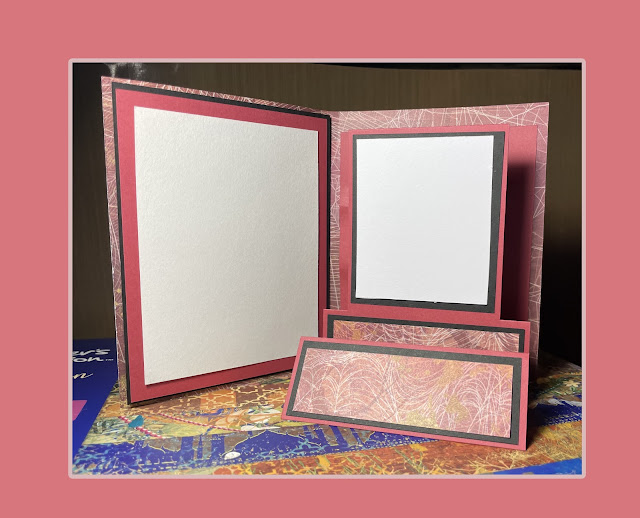
You will also need: 5x7 card, mat panels, pop dots, one sided tape, glue, (and optional stickles glitter glue and rhinestone for eye).

Panel should come in and print at 4.5 inches wide.

Here is the cat's tail.  One in a matching paper, and one a pattern for if you wish to use your own paper.  
Chart panel IS MIRRORED the panel goes on top face down so it needs to be mirrored.  It also has three inches of extra white panel on the right side, that's to tape your panel down for security and for ease when you "peek".
These paper strips are designed to be cut from card stock and have the edges inked instead of folded.
If you plan on printing them out of paper and folding them in the traditional way, enlarge the whole piece almost double.
You may of course, use your own card stock or paper.
Cheat sheet to make sure you always use the right paper.  If you are using your own paper, just cut a small piece and tape over the pre printed design.
Don't forget to post your finished design on my facebook group, I'd love to see them. 
 Facebook        Cricut and Craft Lovers

Tuesday, October 15, 2019

Iris fold Bulb


This is a brand new blog (my Fourth) so it's a little thin.  I wanted to get my printables separate from my other projects as they were getting lost.  Please, sign up or check back often for new things. I have three more Christmas projects done and coming, and another in the works already.  

Christmas Blub

Original painting made for iris folding.  Paper strips painted to match. But any paper or card-stock can be used. Instructions for iris folding and using the Cricut on the instruction page. (See to the left).
If you have never made an iris fold card, here are instructions on you tube.  I will have a page of written instructions soon.  Right now they are on my other blog.

https://www.youtube.com/watch?v=h1pOn1TJ4Os&t=276s

Finished card.  Card made of Silver patterned card stock.  I also used the same silver for the iris center. 
300 dpi, Png files just copy and save. (left click on an image to bring it up, right click to save as)
Other things used on this card at the bottom of the post.

Card Panel


Greeting


Iris strips to print on to your card stock.
Notice there is an extra strip.  I make the snowmen as an extra, you can replace any of the others with it if you wish.  I try to make a combination of multi design and more solid looking, as that combination makes the iris show up best.
These are sized for unfolded card stock, if you wish to use paper and fold your edges, then just double the size of the complete panel.

Cheat Sheet, to make sure your pieces are always in the right place.  If you decide to use your own paper, just cut a piece of the paper and tape it over the others.

And below, the iris pattern.  It is already mirrored and ready to go.   Do not trim, slice or delete the extra white in the panel, that will be used to anchor the pieces.


Supplies listed are what I used, you can substitute some of them.
Supplies: Bright white card stock. (for printing designs)
                 Patterned Cardstock for card (or store bought 5x7 
                    card.)
                 Solid or different print card stock for Card mats.
               *Stickles bottled glitter in holographic clear and silver.
                 Pop dots 1/8" thick (if you are folding paper, you will                        need thicker dots, 7/16".
                *Glue (I use Art Glitter Brand glue)
                *Single sided tape. (you can use glue, but I find tape                        easier.)
                  Small scissors

                *Silver ink pad (Gold, brown, black are other good                              choices.

  Halloween Book Card… Cricut file or Template.  5 x 7.  This is the Cricut version.  Cricut file…  https://design.cricut.com/landing/projec...