Cards and more cards.. Check out my other blogs (listed in profile) for more craft ideas.
Search This Blog
Wednesday, September 28, 2022
Friday, September 23, 2022
Treat Box Card using Cricut Maker Perforated blade.
5 x 7 card. Treat Box is 3.5 inch square and 3/4 inch deep…
Uses the cricut Maker perforated blade to make the pull back tab to reveal the treats in the box.
Instructions on YouTube. https://youtu.be/s67Hu08prbA
Using the perforated blade and a Cricut Maker.
Elephant .. Just for You
(If it says error, hit customize anyway, seems to be a glitch)..
https://design.cricut.com/landing/project-detail/632665c55034c4893331c350
Halloween
Blank..card box, shapes only so free till you add designs of your own.
Sunday, September 4, 2022
Tri-Fold Witch Scene Card for Halloween
Cricut link https://design.cricut.com/landing/project-detail/6312f2427b0ee7eac082607b
Base and panels of card only…just shapes so free to cut. https://design.cricut.com/landing/project-detail/63123b8568752258b33083f7
Hand Panel cut directions at very bottom, to cut your own and decorate with, dies, stamps, or print outs.
The gray of the card can be any color, I used a patterned card stock ..
Cut the pieces…
Fold the panel on the back card…you want to fold one side up, and one side down…it doesn’t matter much which is which you can flip it over or around and use it any way you want…or if you have directional paper, and it’s not the way you want, just switch the way you folded. On this particular design I folded the edge where the big panel up and the other side down…but again, if it’s wrong, just flip it around.
Laying flat it will be 5 x 7. Although you could easily make a smaller or larger card if you wanted.
If you are going to ink the panels to highlight the edges, do it now.
Flatten back out and glue or tape on all the panels. If you are going to dangle the witch, don’t glue down the very top edge of the purple (left side, top) panel.Ink the edges of the moon, and any other pieces you want to highlight.
Glue all the pieces in place…
I put the high layer of grass down first and added the tree and tombstone before adding the second layer of grass, to make it look like they were nestled in the grass.
I also glued only the tree trunk down so I could add the clouds and bats behind them…then glued the branches last..To dangle the witch…note* it doesn’t need to be dangled if you don’t want it to twist in the air…you can glue the top of her hat to the outside of the purple panel instead.
To dangle you’ll need two strands of sewing thread. Glue the thread in between the two witch pieces. Then glue the other end between the card and purple panel, trim.
The spider is done the same, except it’s thread is glued to the back of the web. I coated the spiders thread with holographic Stickles to make it look like spider silk..using fishing line would work, too.
If you haven’t yet, move things out if the way and add the text on the panels.
Here’s a shot of the template…the problem is, to get this card shape as a 5 x 7 card, the measurements are a little wonky…I’ve given the closest approximate length, but look on the actual chart and you’ll see where you need to add or subtract a tiny hair from the measurement…if the two fold panels are the same width, and the fold score line in between them is exactly half way between the two fold panels (which is also half of the larger panel), it should fold perfectly..
Wednesday, August 31, 2022
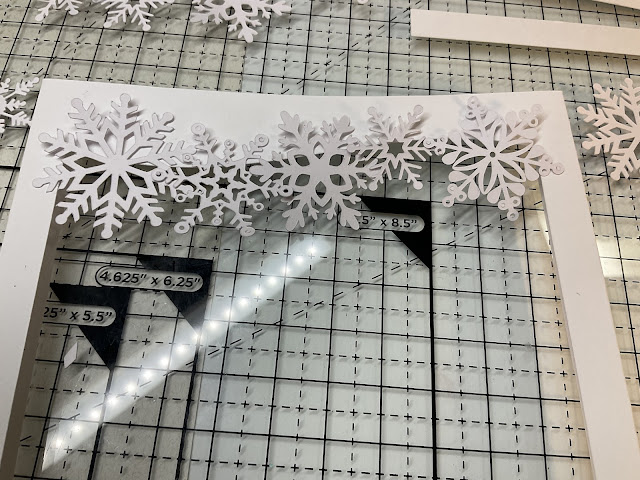
Snowflake Aperture Card with Dangles
Super Fun and Easy.
Snowflake Aperture Card with Dangles
Note…you can use the base and dangle anything for any occasion. You’ll need
1. White card stock…1 piece of 110
2. 1 piece of white card stock 65-80.
3. 1 piece of a blue or patterned card.
4. Paper glue or red line tape,
5. sewing thread.
6. Stickels Glitter glue, blue ink and applicator.
Cricut file here, but the template sizes are included at the bottom.
https://design.cricut.com/landing/project-detail/630d635b063678a623e7bebc
1. Cut all the pieces…on the cricut design page, I have made the front piece gray rather than the white I cut it out of, as I have found the front piece works best from heavier 110 office card stock, (the two colors remind you to use the different card stock.…) while the snowflakes cut much better from a medium weight 65-80. So cut them both from white but use different weights of card for best result.
I also cut the blue inside panel from a winter pattern card stock.
2. Check all the snowflakes to make sure they are completely weeded, getting tiny pieces out after it’s glued onto the card won’t be fun… set the three dangle snowflakes off to the side, use the same I set to the side on the screen or pick your own, you’ll need two each of the same in large, medium, and small.
3. Take five of the others and arrange along the top. When you like the arrangement glue them in place. Repeat along the bottom…
With the ink and applicator ink the snowflakes and card to your liking.
Cut two doubled pieces of thread a bit longer than the card. Center the large snowflake in the center of one of the double thread pieces and glue it on.
Then glue the matching snowflake on top.
Place it about where you think you want it, and place the other two snowflakes beside it then glue them on the string.
Center the flakes where you want them, then use a ruler to mark the exact spot at the top and bottom where you’ll glue the string…it needs to be the same measurement for them to hang even..
Glue the strings down on the back and glue the small panels on top. Trim the string.
Fold the top card piece at the score lines. Glue the folds under the back piece…make sure the printed area is face up, and that the bottom is totally even so it will stand.
Glitter as desired.
That’s it…
You can use the base to create all kinds of dangle things…here are a few ready for ghosts and flowers…
Even change the shape of the aperture.
To hand cut card to use with die cuts or stickers.
Card bottom is 5” x 7”.
Card top is 7” x 6.75” (6 3/4”) put score lines on each side 1/2 inch in.
Make two strips 5” x 1/2”.
Cut aperture any size or shape desired.
But this is the shape of this one.
Saturday, July 30, 2022
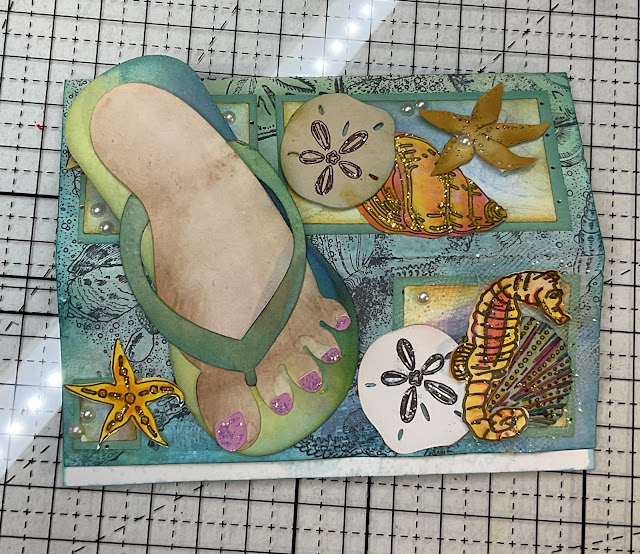
Summer Foot, Simple Easel Card
Cricut file for the foot card.
This actually uses any normal sized card, even a store bought blank. All you have to do is, turn the card landscape, then score the top in half and fold in…add anything to the bottom layer to hold the ‘easel in place…like a few layers of card stock, button, jewels, flowers…
Here’s the above card, from the back and face up.
The background of the back card was make with white 110, office card… then randomly stamped and water colored, wet. The foot was cut from ivory then inked, the mats from patterned card, and rest from white and colored with markers.
And another card, different color scheme…these two cards were mostly cut from solid core card card stock, with a Cricut. The shoe was embodied, the shells were cut in white and colored with markers…the designs were drawn in with the 03 fine Cricut black pen…it didn’t smear with watercolor or alcohol ink.
This last example was a hard cut card (8.5 x 5.5) then folded to a standard A4 card (5.5 x 4.25). The foot, shoe, and shapes were old Sizzix dies and rubber stamps, hand cut and colored.
Thursday, July 28, 2022
Basket
The original template uses a piece of 8.5 x 11 card stock with 1/4 inch trimmed off the short edge… the Cricut template is slightly reduced so you can cut it from a 11 x 8.5 piece of card stock…you can resize the Cricut file to whatever you want. Not sure why the link isn't working directly, if you copy and paste it, it's fine ... very weird. It's also in the Cricut community under Lucine Smith. Bee Basket.
Cricut file with the bees https://design.cricut.com/landing/project-detail/62e2f887fd5669d872a44faa
File of the Basket only. All shapes should be free to cut.
https://design.cricut.com/landing/project-detail/62e2caeefd5669d872a444c0
This link below will get you to me….🤷♀️
How to put the basket together…(the template, if you don’t have a cricut and want to hand cut, is at the bottom of the instructions).
1. Cut out the pieces…you’ll have the main body, 18 rectangle panels, two triangle panels, three strips for handle, 2 outer and two inner circles or other shapes for side accent.
2. Fold and burnish all your score lines, all of them toward the inside.
3. Then flip it over and firmly glue all panels in place…make sure the outer edges have glue on them, or they will pop away from the base when put together (like mine did🤨🙄)…
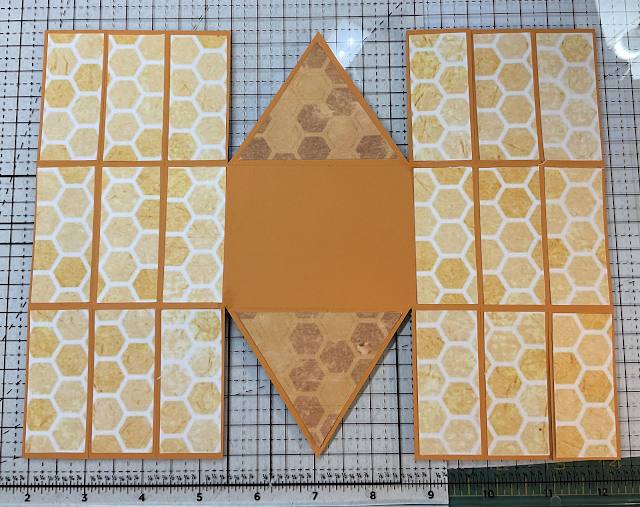
4. Glue the two top panels together (or use red line tape). Move the other stuff out of the way downward. Then attach about 1/4 inch total on the edges.
The next two panels are glued on, not quite halfway up, but as close to the center as possible. Keep the side folds in place. They will be angled downward a bit.
Then glue up the last two side panels the same way.
Put glue on the remaining piece (The triangle) and fold up and into place. Lay it down and rub well inside to make sure it sticks well.
Do the other side exactly the same way.
Curl, with your fingers, all three of the handle pieces before you glue them together, this will keep them from wrinkling or pulling away when you attach them to each other.
Then, Glue the three pieces on top of each other.
Glue the handle inside the basket.
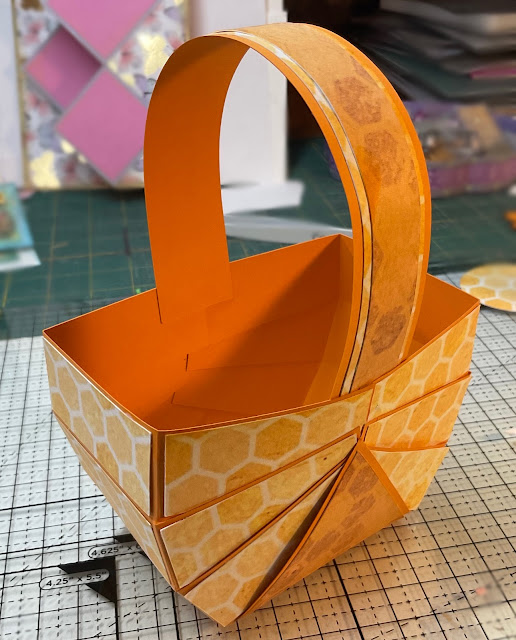
Add your side decorations.
The bees on the top basket were drawn from Cricut Access images with the fine point Cricut pen on white card stock and colored with alcohol markers. The bees on the bottom basket were stamped with a Crafters Companion stamp and ink and then colored, one with CC alcohol ink and one with watercolor.
Template.
Base is made from one sheet of 8.5 x 11-inch card stock (you'll need two, if you want the base of the handle to be the same color).
1. You need to trim 1/4 off the bottom edge to have 8 1/4" x 11".
2. Turn the sheet in a landscape orientation. Score the entire distance top to bottom at 1.25 (1 1/4"), 2.50 (2 1/2"), 3.75 (3 3/4"), 7.25 (7 1/4"), 8.5 (8 1/2") 9.75 (9 3/4").
3. Also, score the long way at 2.75 (2 3/4) and 5.50 (5 1/2") That should divide the paper into exact thirds.
4. At the top and bottom mark exactly halfway across the sheet, that's at the 5.5 mark. Draw a line from the top of the mark down to where the first two score lines meet. Do this on both sides of the mark and both side of the panel. (the triangles in red.)
5. Cut the lines along the score lines that are red.
6. Handle. Cut one strip the base color. 1.25 x 10 inches (1 1/4" by 10") Cut one or two more decorative pieces (matching the decorative panels) to nest inside the base strip. Keep the 10" length, but reduce the width as desired, about 1/4" smaller each. (about 1" x 10", and 3/4" x 10" but it's whatever you choose).
7. Decorative Panels. 1 sheet of Patterned cardstock or paper of choice. You'll need 18 rectangles ... 1.125" x 2.6" (or roughly 1 1/8" x 2 3/5") It doesn't have to be exact, just consistent, so make one template and use that to cut them all. You will also need two triangles in a contrasting patten. The base width is 3 1/8" and the height is a bit less than 2 1/2" but the easiest way is to draw around the triangle piece itself and trim about 1/8" off all the way around it and use that for a template. Similar to the dark grey piece at the very center top.
8. Decorative Circles. These are also cut from the patterned card stock. They can be any shape or decoration desired.
9. Once you have your pieces cut, follow the same directions posted above to put it together.
Subscribe to:
Comments (Atom)
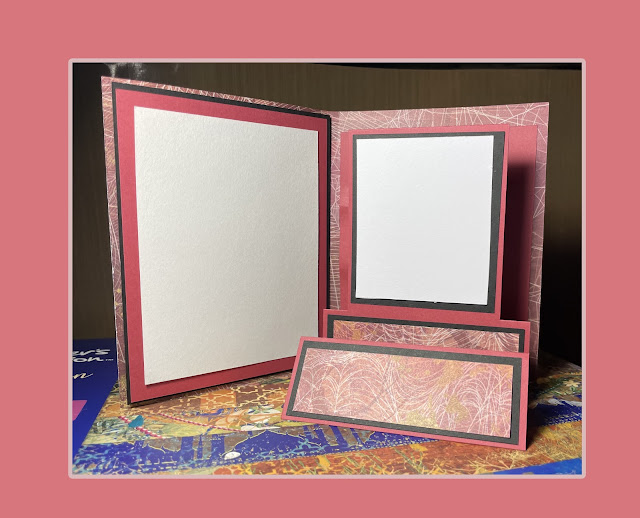
Inside Stepper Card
Inside Stepper Card. This is a Cricut file (and Almost Crafters Companion template Violet 23). I couldn’t get the CC template to stand up ...
-
Tower Flip Card There is a cricut link for an Easter chick card, (shown here) a Spring Card (shown below), and a template for hand cut a...
-
Inside Stepper Card. This is a Cricut file (and Almost Crafters Companion template Violet 23). I couldn’t get the CC template to stand up ...
-
Standing Panel Card Lots of folding panels makes this super simple card look elegant. Decorate with anything. Frogs and bunny’s make it fun...


